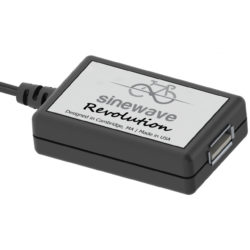
Description
UNLIMITED POWER FOR:
Cell Phones
GPS
Battery Packs
Rechargeable Headlights
Rechargeable Speakers
Any USB-powered device!
FEATURES:
Best in class efficiency
High Speed Overload Protection
Easy Installation
Shock and vibration toughened
Waterproof
Gold-plated USB connector won’t rust or corrode
SPECIFICATIONS:
Starts charging at 3.5 MPH (5.5 km/h)
Full charging at 9 MPH (14.4 km/h)
Max current: 1 Amp
Weight: 43 grams (35 grams Reactor, 8 grams wire)
Stack height: 9.8 mm
Wire length: 91 cm
Wire ends: stripped wire (for hub connection), Reactor pins (for Reactor connection)
WARRANTY:
1 year
IN THE BOX:
Reactor dynamo USB charger
Headset bolt with nut
Wire
Dowel for installation
REACTOR INSTRUCTIONS:
1. Knock your star-fangled nut down to about 45 mm from the top of your stem (or the highest headset spacer, if you have spacers above your stem). You can use the provided 45 mm dowel as a guide – the dowel should be just about flush with the top of the stem/spacer when the nut is at the correct depth. You can use the provided bolt and nut to do this. Place the nut on the bolt and spin it down as far is it can go (if your bolt is fully threaded, spin the nut down about 20 mm). Next, screw the bolt into the star-fangled nut as far as that can go. You can now carefully knock the star-fangled nut down with a hammer. It helps to remove the fork from the bicycle to do this.
2. By carefully pulling the wires apart, split the Reactor wire from the ends up until the tubing prevents further separation. This step is only necessary if you have a star-fangled nut with smaller gaps. The wire can remain together if you have a star-fangled nut or expander plug with a gap large enough for both wires. Drilling a bigger hole into the star nut can be an option as well.
3. Feed one wire through a gap in the star-fangled nut and push it down the steerer tube until it comes out at the fork crown. This is possible even if the upper and lower gaps are not aligned, it just takes some wiggling and twisting of the wire to get it started.
4. Do this again for the second wire, using an adjacent gap in the star-fangled nut.
5. Run the wires down the fork and connect them to the dynamo using the plug that usually comes with your dynamo hub like the Shutter Precision dynamo hubs.
6. At the top of the steerer tube, plug the wires into the bottom of the Reactor. There is no polarity, you can connect them either way.
7. Insert the Reactor into the steerer tube. A slight twist can help the wires go in smoothly. The Reactor should easily seat in the steerer tube. If there is resistance check the depth of the star-fangled nut, forcing the Reactor down with the bolt could damage the Reactor or the wires.
8. Using the bolt provided, screw the Reactor into the star-fangled nut. If necessary you can use it to adjust headset preload in the same way you would with a regular stem cap. The nut should be removed at this point, it was only needed to help move the star-fangled nut.


