Description
WHAT ARE THE DIFFERENCES BETWEEN BEACON 2 AND BEACON 1?
-
- Flicker-free light down to 3-4 MPH.
- Low brightness mode for dynamo and external battery power.
- Standlight is controlled by toggle switch and can be turned off.
- Standlight charges even when the light is off.
- Blinking mode when using external battery power.
- Taillight output is powered by the external battery input in addition to the dynamo.
- Regulated taillight output for more efficient taillight performance; no resistor needed when using Supernova E3 taillight.
- For more information visit Sinewave’s Beacon 2 Headlight FAQ
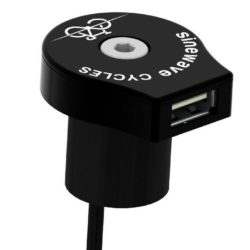
INTEGRATED USB CHARGER:
Unlimited power to charge your phone, GPS, or any other USB device directly from the Beacon.
FLEXIBLE POWER OPTIONS:
An external, off-the-shelf USB battery pack can be connected to maintain bright, flicker-free light even when stopped or riding slowly.
Any available dynamo power replaces battery power until reaching a speed when all power is provided by the dynamo and the battery is no longer used.
750 LUMENS:
Lots of light, suitable for any style of riding.
SYMMETRICAL BEAM PATTERN:
Ideal choice for off-road riding.
SUPERIOR BRIGHTNESS AT LOW AND MEDIUM SPEEDS:
Dynamo power is optimized at low-to-medium speeds.
Reaching 100 lumens at 5 MPH, 375 lumens at 8 MPH, 600 lumens at 10 MPH, and 750 lumens at 13 MPH.
CHARGER PRIORITY MODE:
Intelligently balances power between light and charger to optimize simultaneous use.
STANDLIGHT:
A supercapacitor, charged while riding, provides about 5 minutes of standlight when stopped.
COLOR OPTIONS:
Many anodized colors are available.
You can also mix-and-match different colors for the front, middle, and back of the Beacon.
Pick a combination that matches your bike or represents your country or team.
Contact us about custom colors.
MOUNTING OPTIONS:
The 10mm mounting tab is compatible with mounting hardware from B&M, Supernova, Schmidt, etc.
COMPACT DESIGN:
L x W x H: 58 x 42 x 42 mm
115 grams (includes 36″ dynamo wire)
TAILLIGHT OUTPUT:
A taillight output is available and is controlled by the headlight.
BETTER COLOR TEMPERATURE:
While still in the “cool white” range, the Beacon generates slightly warmer light than other LED headlights.
This results in less glare, less strain on your eyes, and does a better job reproducing natural colors.
WEATHERPROOF:
Designed to be used in any conditions.
Multiple seals protect against water ingress, electronics are potted in epoxy, and all connectors are gold-plated.
Designed to resist the elements.
MADE IN THE USA:
All Sinewave products are made in the USA.
The Beacon is the only commercially available dynamo light made in the USA.
WARRANTY:
3 years
IN THE BOX:
The Sinewave Beacon
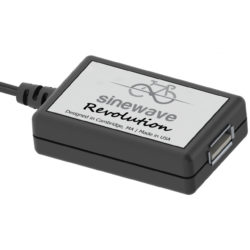
A USB-to-DC cable
BEACON INSTRUCTIONS:
INSTALLATION
1. Mount the Beacon to your bicycle using standard mounting brackets. The Beacon uses a standard 10 mm mounting tab and is compatible with mounting hardware from Schmidt, B&M, Supernova and others.
2. Connect the long cable from the bottom of the Beacon to the dynamo using the included plug. The wires can be connected in either polarity.
3. The short cable from the bottom can be connected to a taillight.
4. The Beacon taillight output is DC. The “striped” taillight wire is the positive lead. This should only matter when connecting to a DC taillight like the Supernova E3 or Exposure RedEye. For most taillights (B&M, Schmidt, etc.) you can connect in either polarity. For more information visit Sinewave’s Beacon 2 Taillight Information.
5. Be careful to prevent the taillight wires from shorting together or shorting to the bicycle frame. Heat shrink tubing or electrical tape can be useful for this. If not using a taillight the exposed ends of the taillight wires should be clipped off.
6. If using a USB battery pack to power the Beacon, use the USB-to-DC cable to connect the battery to the barrel connector on the back of the Beacon.
For more information visit Sinewave’s Beacon 2 Instructions.
OPERATION
1. Setting the toggle switch to the middle position turns the light off. The USB charger is active in this mode. As no power is used by the light, the best USB charger performance will be available in this mode.
2. Setting the toggle switch to the up position enables full brightness for the light, both from the dynamo and external battery. The USB charger will remain active in this mode. However, we generally recommend not using the charger in this mode.
3. Setting the toggle switch to the down position enables the “Charger Priority Mode”. This mode is designed to optimize charger performance while reserving enough power for a “be seen” light. Therefore, it is recommended to use this mode as a daytime running light, or as a “be seen” light in an otherwise illuminated area. We recommend using just the light and unplugging from the USB if relying on the light for illumination at night.
This is also a low brightness setting when using a USB battery pack and can be ideal for riding when less brightness is required or even to illuminate a campsite.


